
Classic Nymphing Course
The Drift
If the drift is the most important part of nymph fishing, why did we wait all the way until this section to teach you? It’s because the key to a good drift is getting the first three lessons right. You can’t get a good drift if you are too shallow or too deep or too heavy for the water you’re fishing. You can’t get a good drift if you aren’t set up with some good flies, and you can’t get a good drift without an accurate cast. A good cast will save you a mend, increasing your chance to get a drag-free drift, and the right rig set up will get your flies down where they need to be and drift as they need to in order to catch fish.
Let’s go over the major components of a drift. Achieving a perfect drift as often as possible will maximize the number of fish you catch and fun you have on the river.
Classic vs Tightline Nymphing Drifts
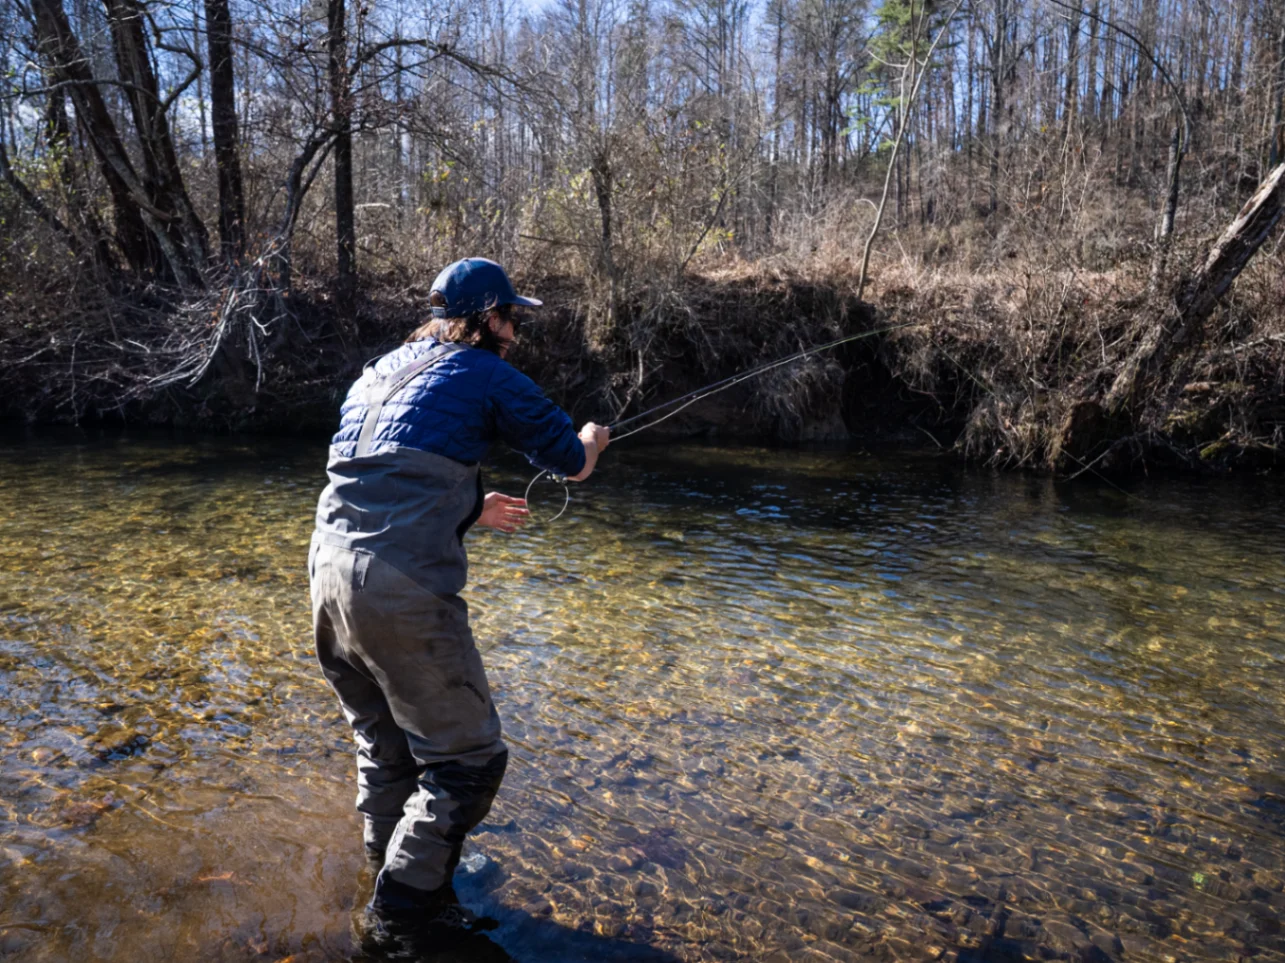
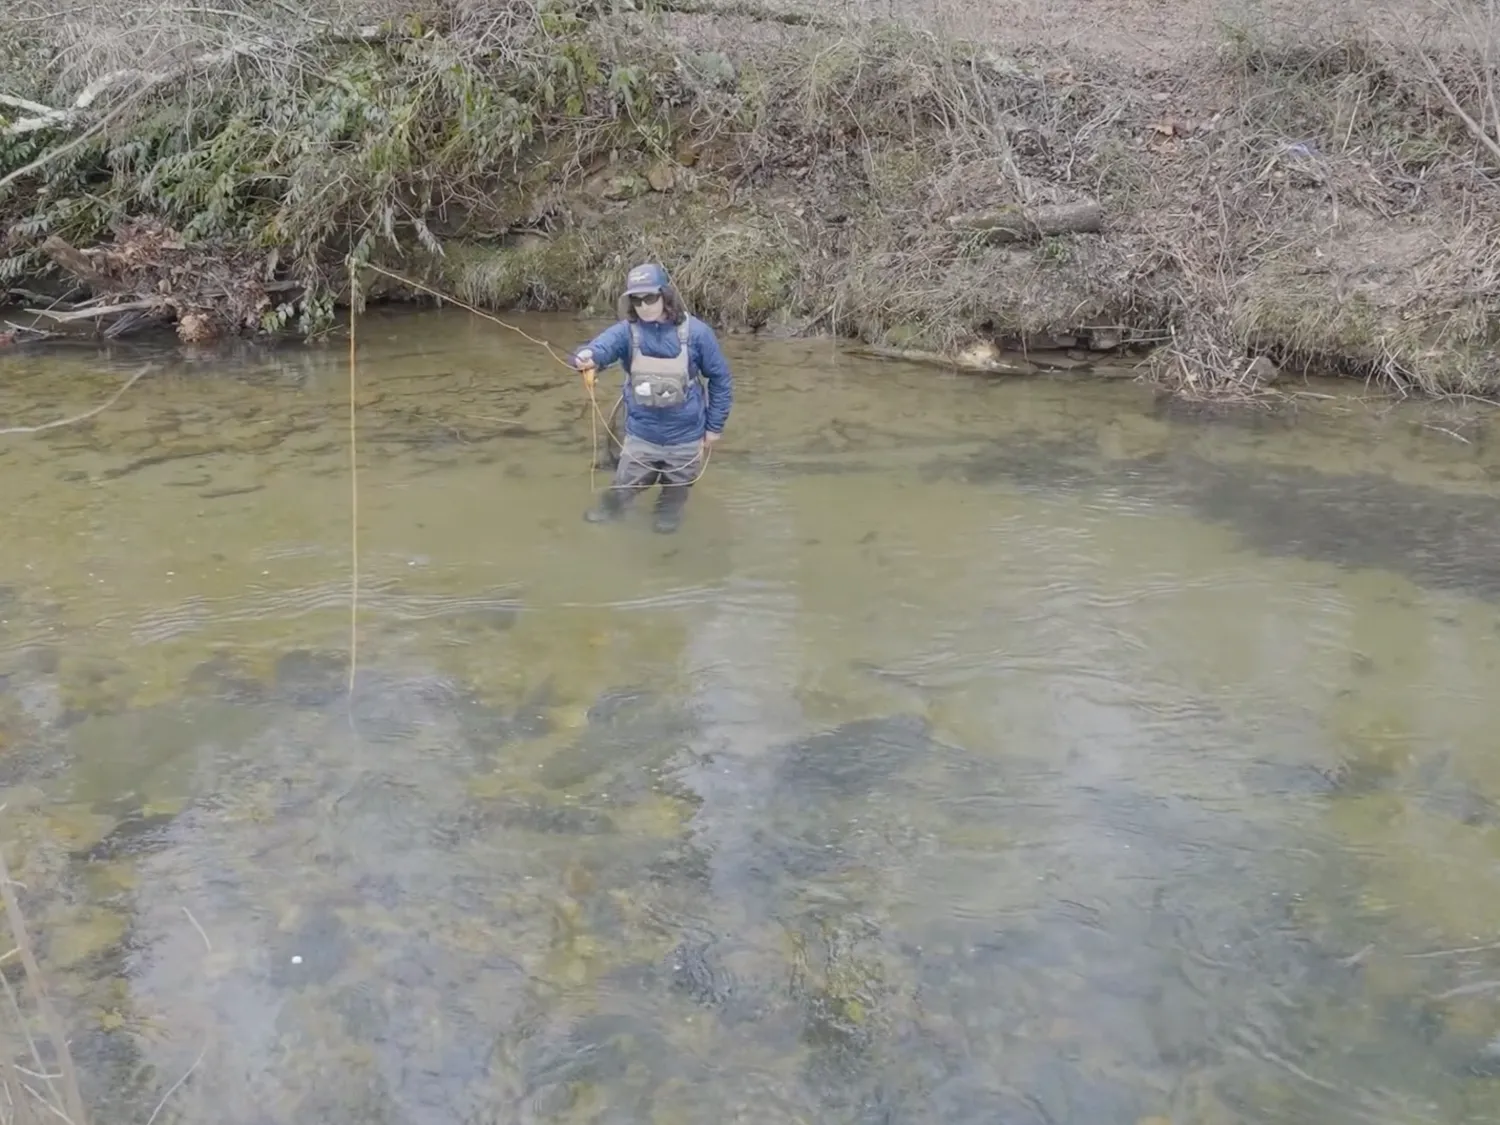
While the overall goals are the same—a drag free drift, flies in the strike zone, and less drag caused by the line on the water—the ways in which you accomplish them varies a bit in tightline vs classic nymphing.
The biggest difference is the use of a strike indicator or suspension device, which affects your ability to control the depth of the flies. With an indicator, you are committed to a fixed depth, which is affected by water speed. One of the advantages of tightline nymphing is that you can quickly adjust your depth. Another major difference is line control. Using a strike indicator, you can cast up to 50 feet and still be able to detect strikes, set the hook, and land a fish. With tightline techniques, you must always be with a range that allows you to keep a tight line tight and feel the connection with the flies, as it’s the only way to detect a strike. Lastly, the way in which you manage the drift is important. With tightline techniques you’re often at a 90-degree angle from where the line enters the water, which helps the flies drift drag-free and helps you to feel a strike.
So while tightline and classic nymphing techniques have the same goals and components, the ways in which you execute those goals is where the major differences lie. Let’s dive into the tips and techniques needed to get a good drift both for tightline and classic techniques.
Trout University
The Best Way to Master Fly Fishing for Trout
Everything you need to learn how to fly fish for trout.
From fly selection to presentation and location, all in one place.
8 Premium Courses
15 Video Classes
1-2hr Power Classes on Key Subjects and solidify your learnings
6 Streamside Courses
10+ Hours of Fishing to See Our Methods in Action
Depth Control
Get Your FLies in the Zone
Getting the flies to the right depth is the number one issue most novice nymph anglers struggle with. They either have too little or too much weight or their indicator is set to the wrong depth. How far will a trout move for a piece of food? As little as possible. Trout will always be more willing to eat if you put a fly on its nose, rather than forcing them to move three feet across or upward. Trout rarely feed below themselves and are usually more willing to move side to side, instead of up and down, to eat. This means you can’t be too deep or too shallow, or you’ll likely miss a lot of fish.
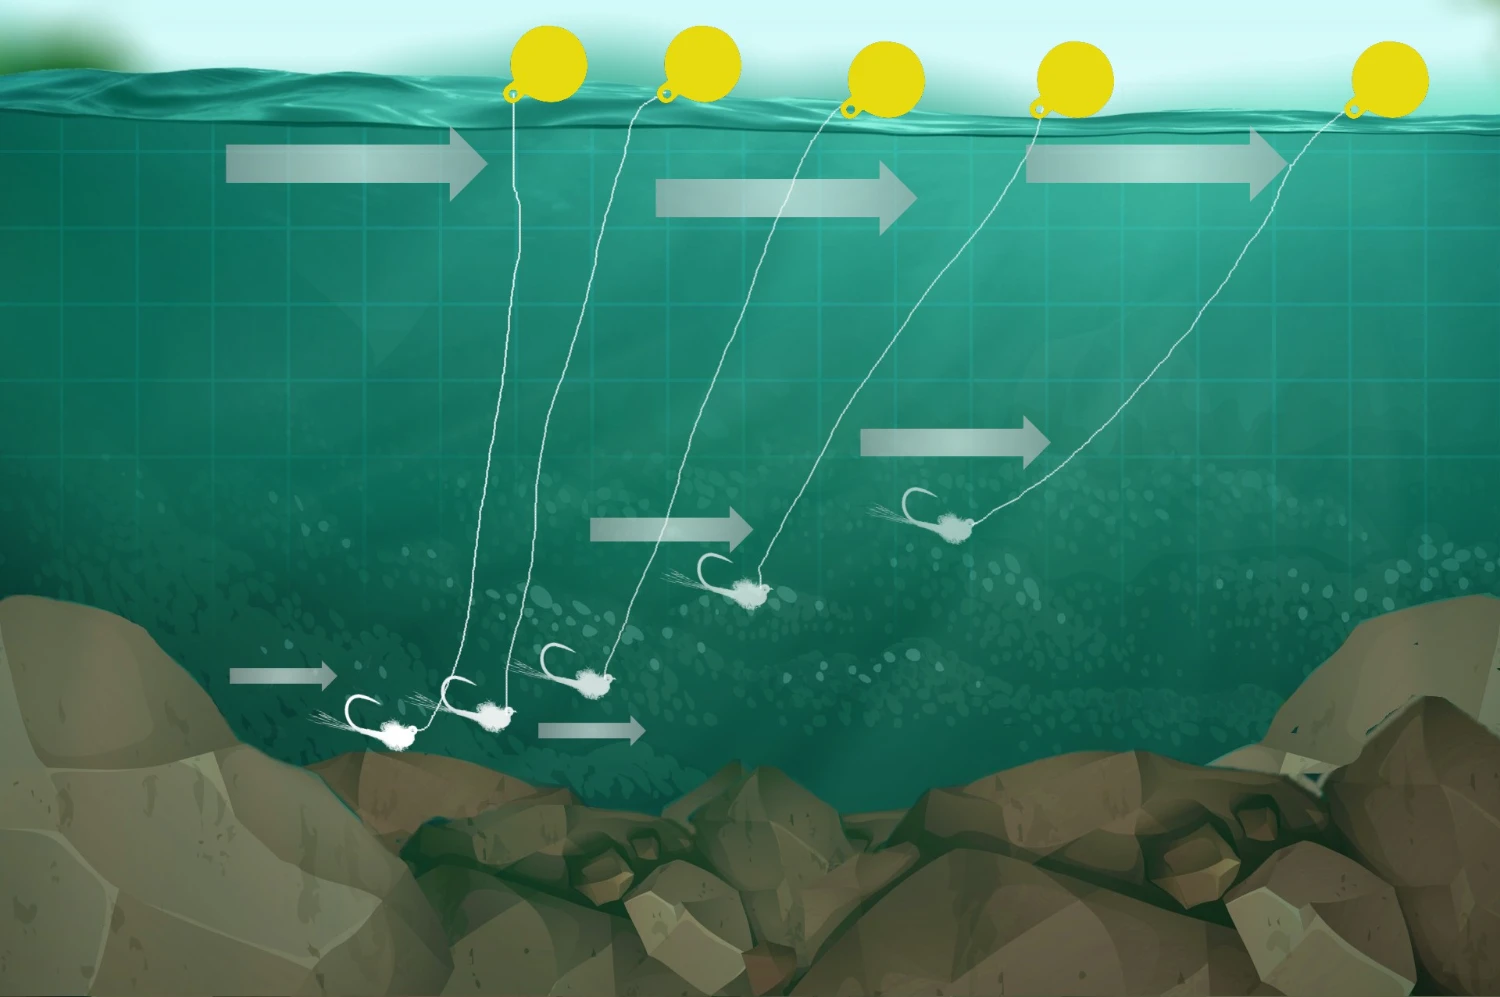
How do you get the right depth? The answer changes with the river, but there is a general formula to follow as a starting point and then make adjustments as needed to find the fish. You will know you have the right depth when the fish start eating. After you’ve tried all the changes you can in depth, then change flies. It’s a safe bet to assume it’s not your fly selection but your depth that is hurting your ability to catch fish on the drift. Start with depth adjustments first, and then, if needed, change flies.
Rule of Depth
Rivers don’t flow at the same speed or have the same currents or depth. Even moving five feet up- or downriver can change things drastically. The rule of depth we are going to share with you below is just a way for you to memorize some general principles, so you have a good idea where to start. In time and with practice, you’ll be able to select the right depth with 80 percent accuracy before even getting in the water. It just takes some time to learn and get a feel.
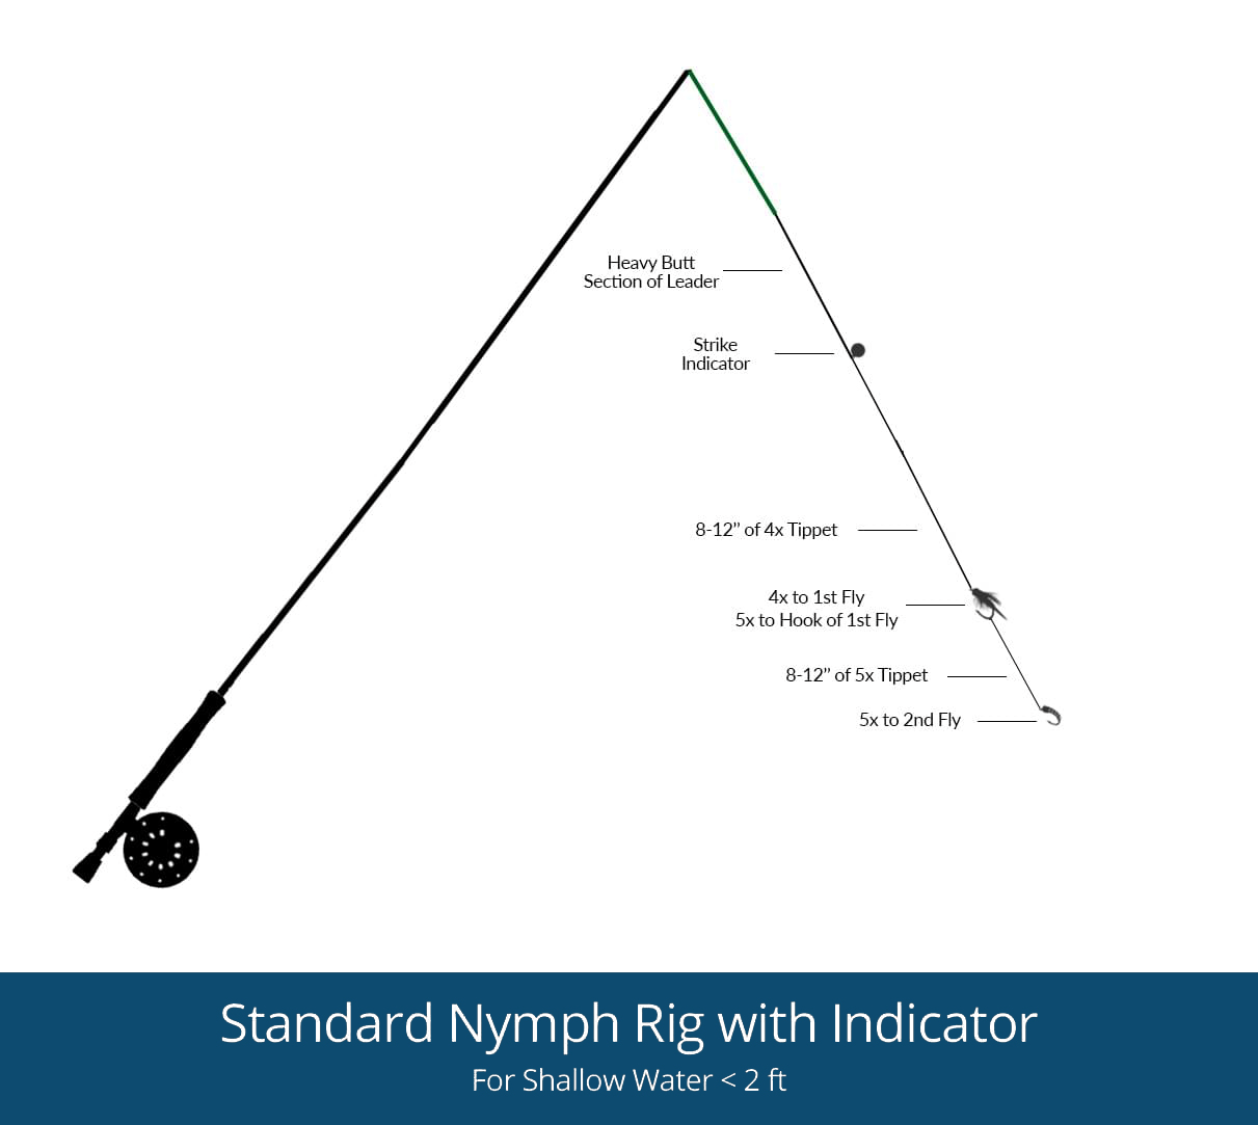
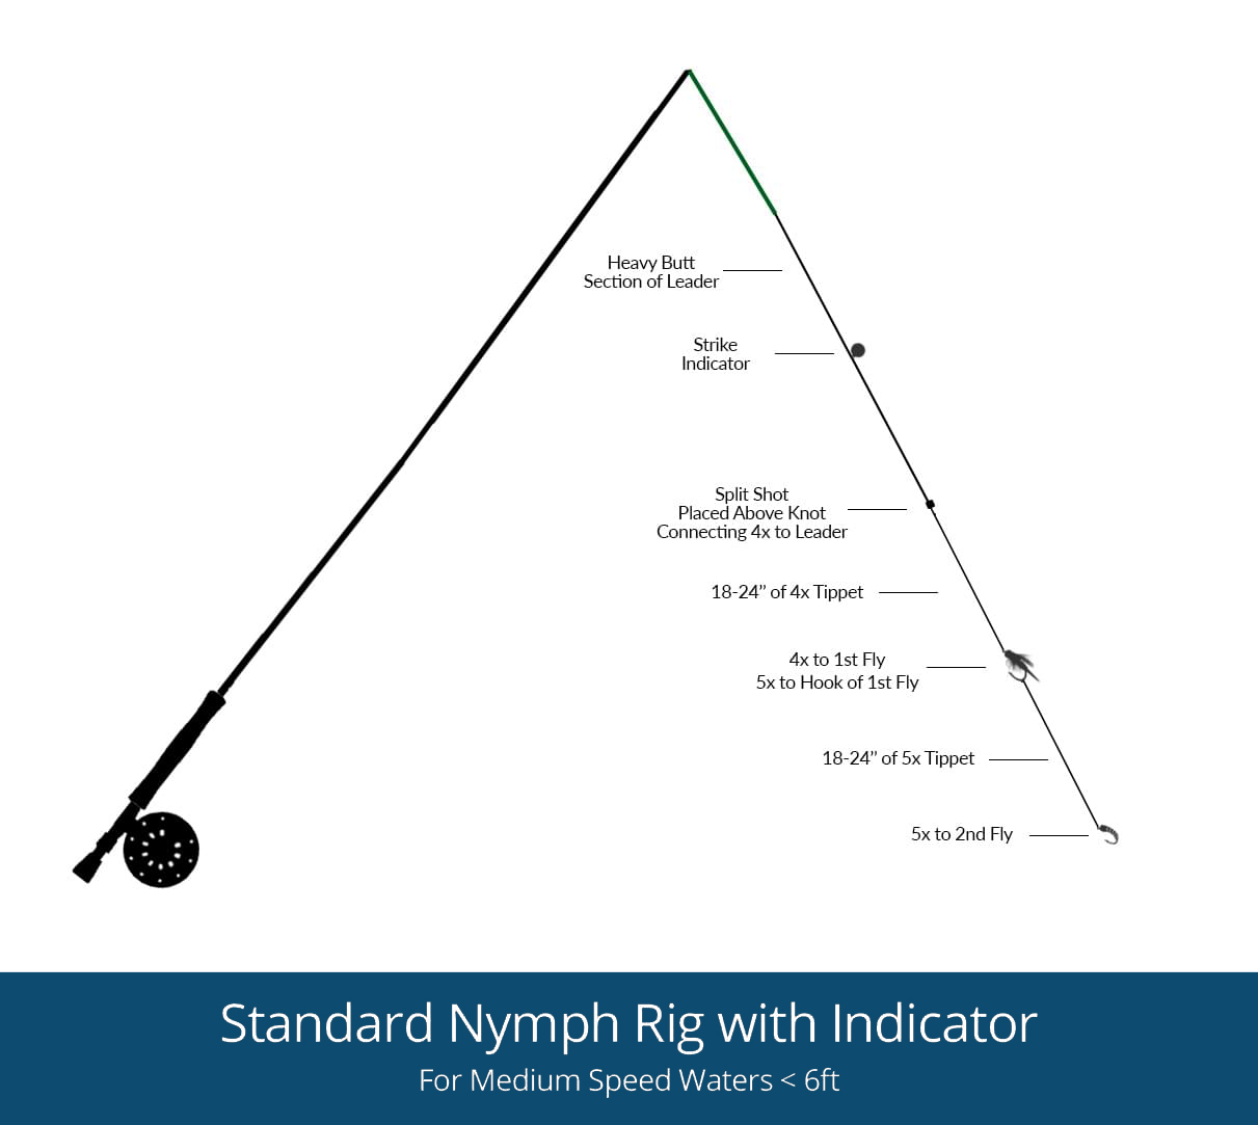
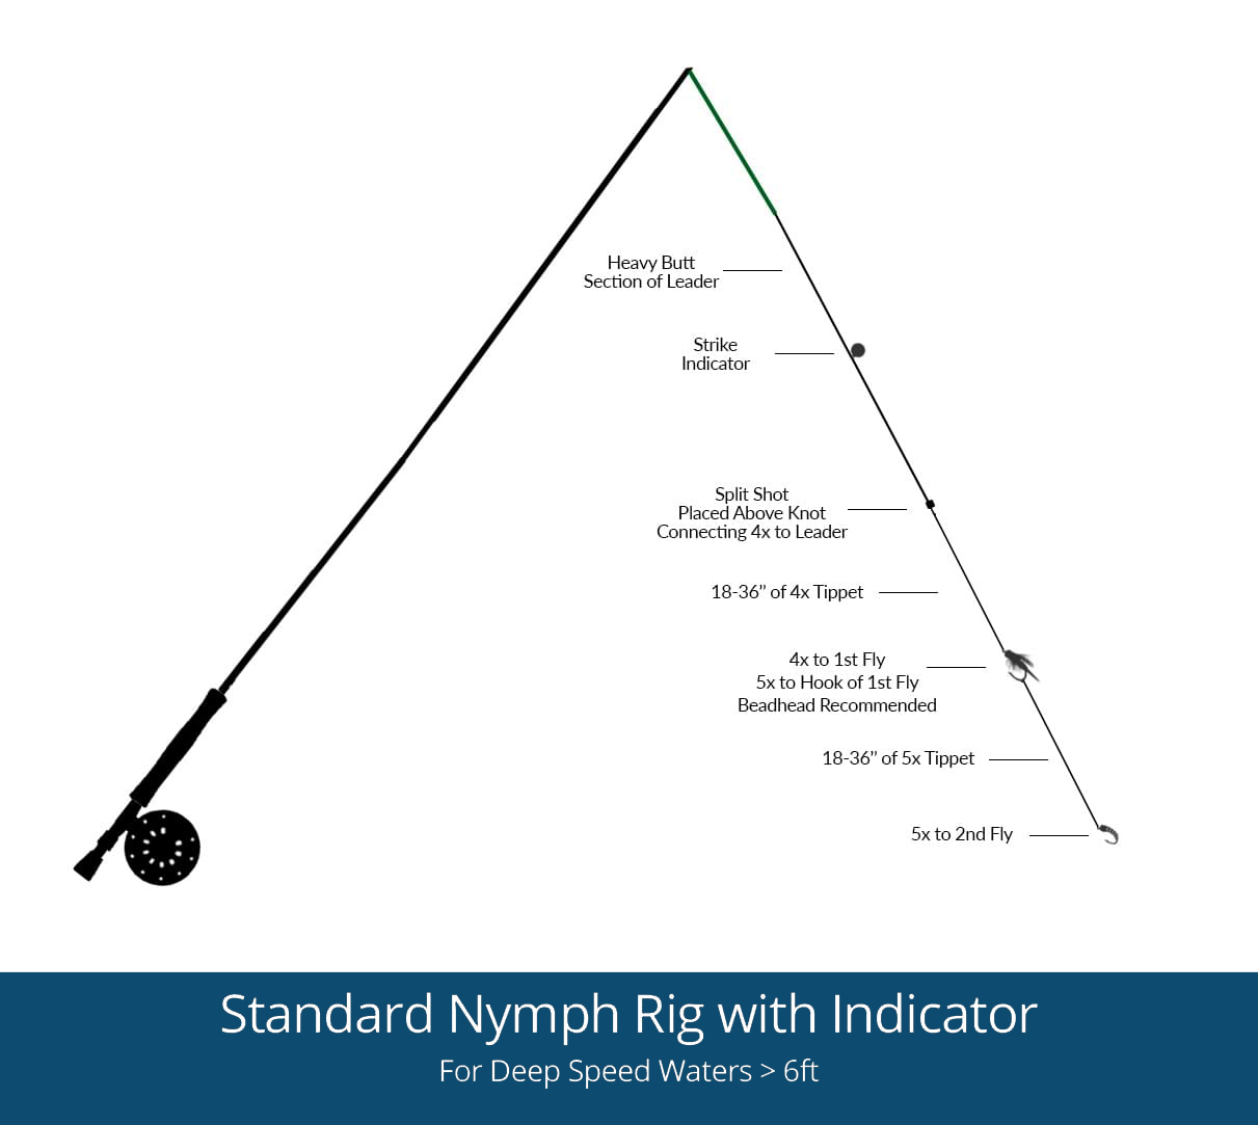
Let me quickly define what we mean by depth. Depth is the distance from where your leader enters the water to your bottom fly. For example, if you are fishing with a single nymph and your indicator is 36 inches above that fly on your leader, the depth of your rig is 36 inches. As you will learn below, that is not enough to get your fly down 36 inches below the surface because of water speed and currents. If you aren’t using a strike indicator, then your depth is from where your leader goes below the water to your last fly. Knowing the distance from the last fly to your sighter line on an indicator-less rig helps you know your depth accurately.
Now let’s go over what affects your fly’s depth in a river.
Water Speed
The speed of the water is often the biggest factor affecting how deep your flies drift and for how long. Adding weight or length (i.e. depth) to your rig will help reduce the effects of water speed. I think it’s best to simplify and call water fast, medium and slow.
- Fast Water means there is substantial whitewater in the current.
- Medium Water means there is visual flow but no whitewater and the water has distortion from the current. This is often the best water to fish for trout.
- Slow Water means there is little to no visual flow, no whitewater and if clarity is good, you can see into the water well. This is often where there is little gradient in the stream bed and the water deepens slowing everything down. It can be hard to get a good drift in very slow water as the current is minimal.
Mixed Currents
Beyond fast, medium and slow, your ability to get the right depth is affected by variable currents in the water. For example, it’s almost always the case that the water on the surface is faster than the water at the bottom, which is why you see so many trout at the bottom of the river. There are times when water will be fastest in the middle, medium speed on the surface and slowest at the bottom, and a mix of other scenarios, as well. The only real way to handle this is to lengthen your leader below the indicator. Putting more slack between the flies and indicator means that the currents will affect the flies less.
Water Depth
While the depth of the water doesn’t affect how your flies move through the water, it is something you have to account for when setting up your rig. This is where the rule of depth comes into play. Based on the depth of the water and the speed, the appropriate set up is applied.
- In slow water, the distance from indicator to last fly should be 1.25 times the depth of the water.
- In medium-speed water, the distance from indicator to last fly should be 1.5 times the depth of the water.
- In fast water, the distance from indicator to last fly should be 3 times the depth of the water.
For example, if you’re fishing medium speed water that is about 4 feet deep, you should set your depth at 6 feet (1.5 x 4 = 6).
In fast water that’s a riffle and only 1 foot deep, your depth should be set at 3 feet ( 3 x 1).
But what about weight and split shot? We are assuming with this rule that you have at least one beadhead nymph and/or split shot on your rig, if not more. Remember: you want as little weight as possible to get your flies in the strike zone. Split shot adversely affects a natural drift, but is essential to get your flies down. If you have more or less weight, increase or reduce the depth of your rig slightly.
Achieving the proper depth is more art than science, but starting with a formula can really help you get where you need to go and catch more fish.
The Salad Rule
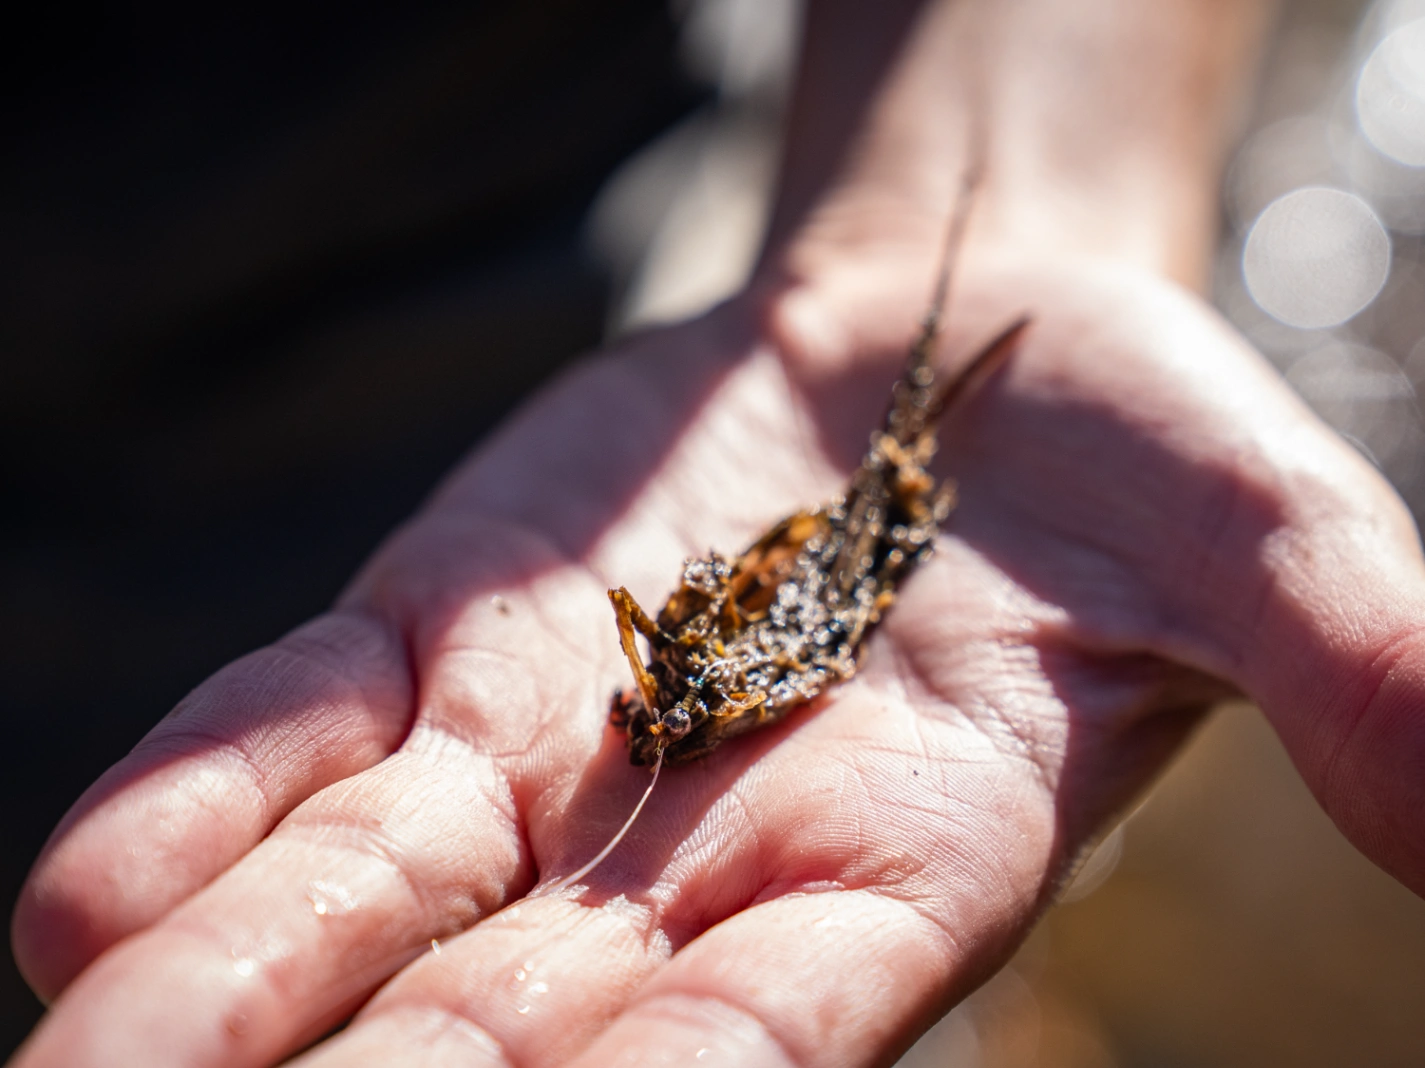
How do you know if you’re getting the right depth? A good way to figure out if your flies are getting to the bottom is if, on one out of every ten drifts, you get “salad” on your flies. If you pick up debris from the river bottom, often green sludge from river foliage, then you’re doing well. If you aren’t getting salad every ten casts or so, you aren’t deep enough or heavy enough. If you are getting salad more like every four drifts, then you are too deep or too heavy and should adjust. But keep in mind that it’s better to be slightly too deep and than too shallow. Of course, if you are hooking fish, then you have the right depth.
If you apply the rule of depth and the salad rule, along with the rigging tips and set ups we provided, then you should be able to consistently get in the strike zone during your drift.
Line Control
Controlling Slack & Preventing Drag
Another key aspect to achieving and maintaining a good drift, is line control. This is the hardest part for beginners because you have to put so much work into getting your rig set up, manage a decent cast upstream that lands in the river and not in a tree. Once you actually achieve that, you can’t even take a second to pat yourself on the back because your line is coming back at you, and you need to maintain as little slack as possible to avoid missing the fish when it eats.
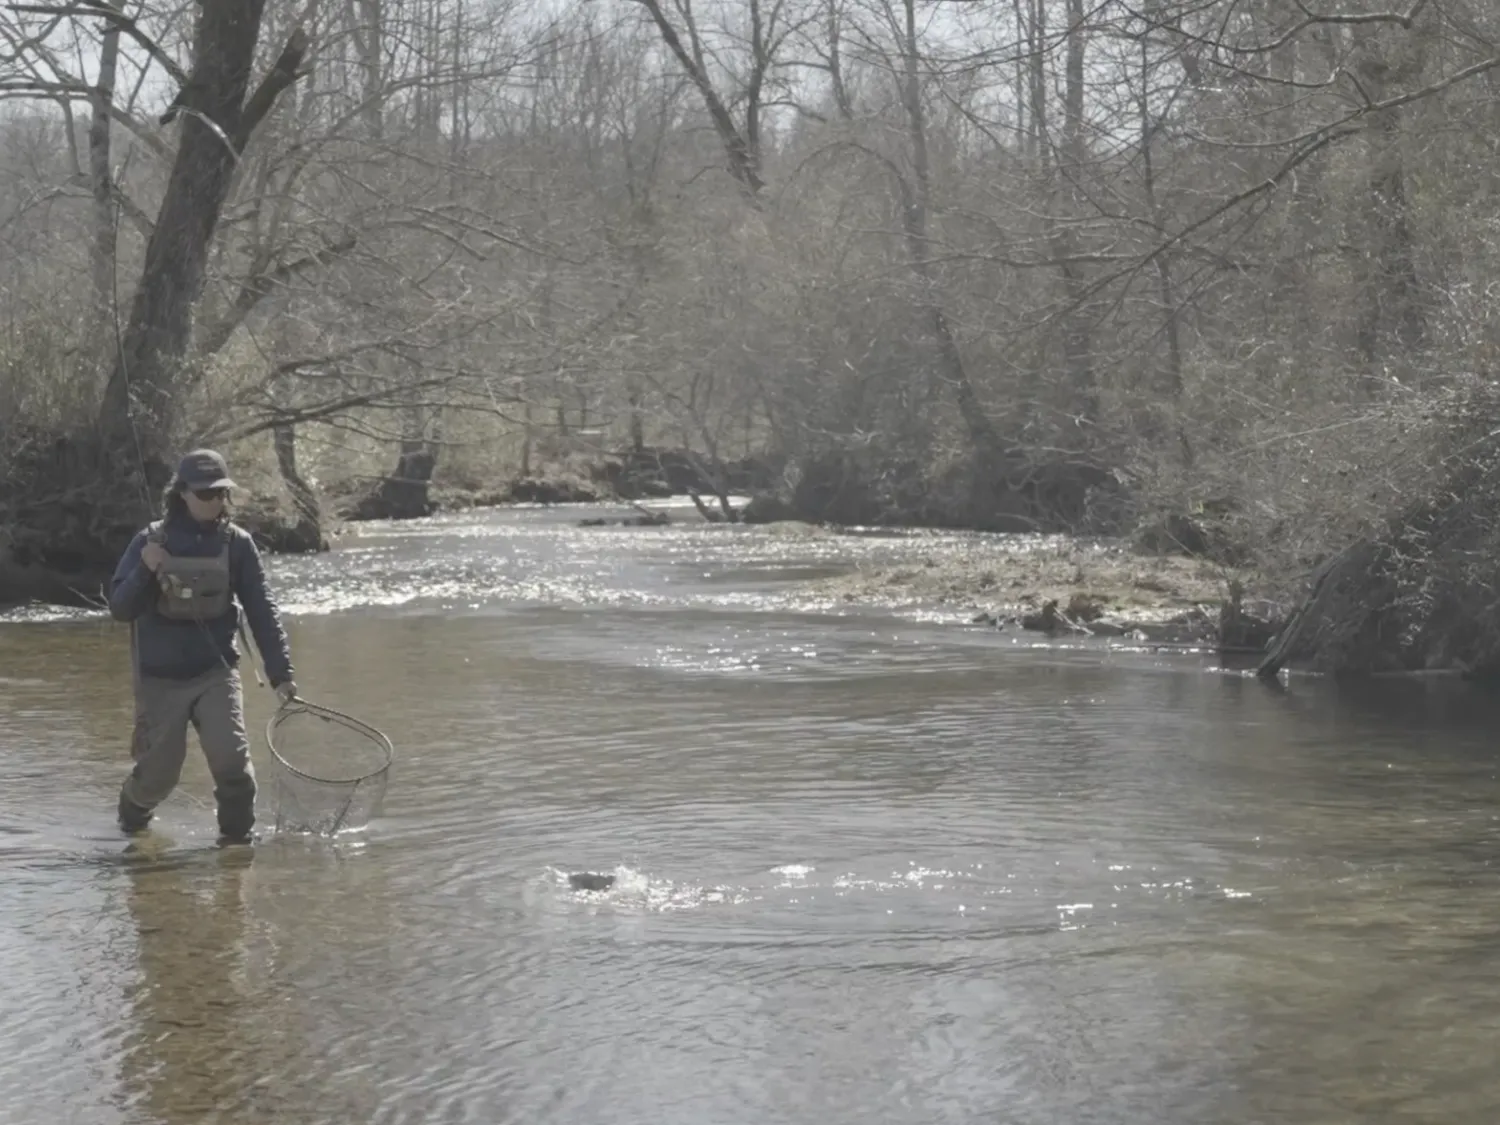
If you’re a beginner, you need to understand something that fly fishers often take for granted: We don’t really use our reels in fly fishing except for when we hook a fish, and even then the reel doesn’t come into play unless the fish is large or extremely hard-fighting. What we do instead is pull out line from our reel and let it just float below us. Then when we cast, the line goes out, and we use our line hand to strip that line back in. When you are casting upstream and letting the flies and line come back toward you, slack will develop immediately, and it’s your job to strip line to match the speed at which the line is coming back toward you. You must strip in line fast enough that you keep it tight, but not so fast that you pull the strike indicator and create drag. You’ll find that balance, but in the meantime, there is often a better way. Using the tips and techniques below, you can eliminate 95 percent of this struggle and often catch more fish in the process.
Let’s first go over the problems caused by slack, and then we’ll discuss some solutions.
The problems with slack are two-fold. First, if you have too much slack in your line when a fish eats your fly, you won’t be able to set the hook properly. If you can’t set the hook well, you won’t be able to land the fish. If you have so much line out that you can’t come tight to the fish by lifting your rod tip, then you have too much slack.
The second problem with slack is that you lose control of your drift and create drag with your line. When you have too much line on the water, the current is more likely to drag your flies in unnatural ways. This can kill your chances of catching a fish. Whenever possible, keep the smallest amount of line on the water as possible.
If you can keep slack to a minimum, you will be able to get a drift that is worthy of fooling a trout, and you’ll be able to set the hook well when a fish eats.
Now that we understand the problems with slack and drag, let’s address the cause of these drag, water current. We’ll define the different kinds of currents and water types. Once you understand these, you’ll be able to see why the tips and techniques below work to maintain proper line control.
Understanding Currents
Let’s go over the different types of currents and also touch on water types. We will start with some definitions and descriptions and then offer a few tips on how it affects your line control. In later lessons, we’ll go over how to nymph these different water types and currents effectively.
Current Types

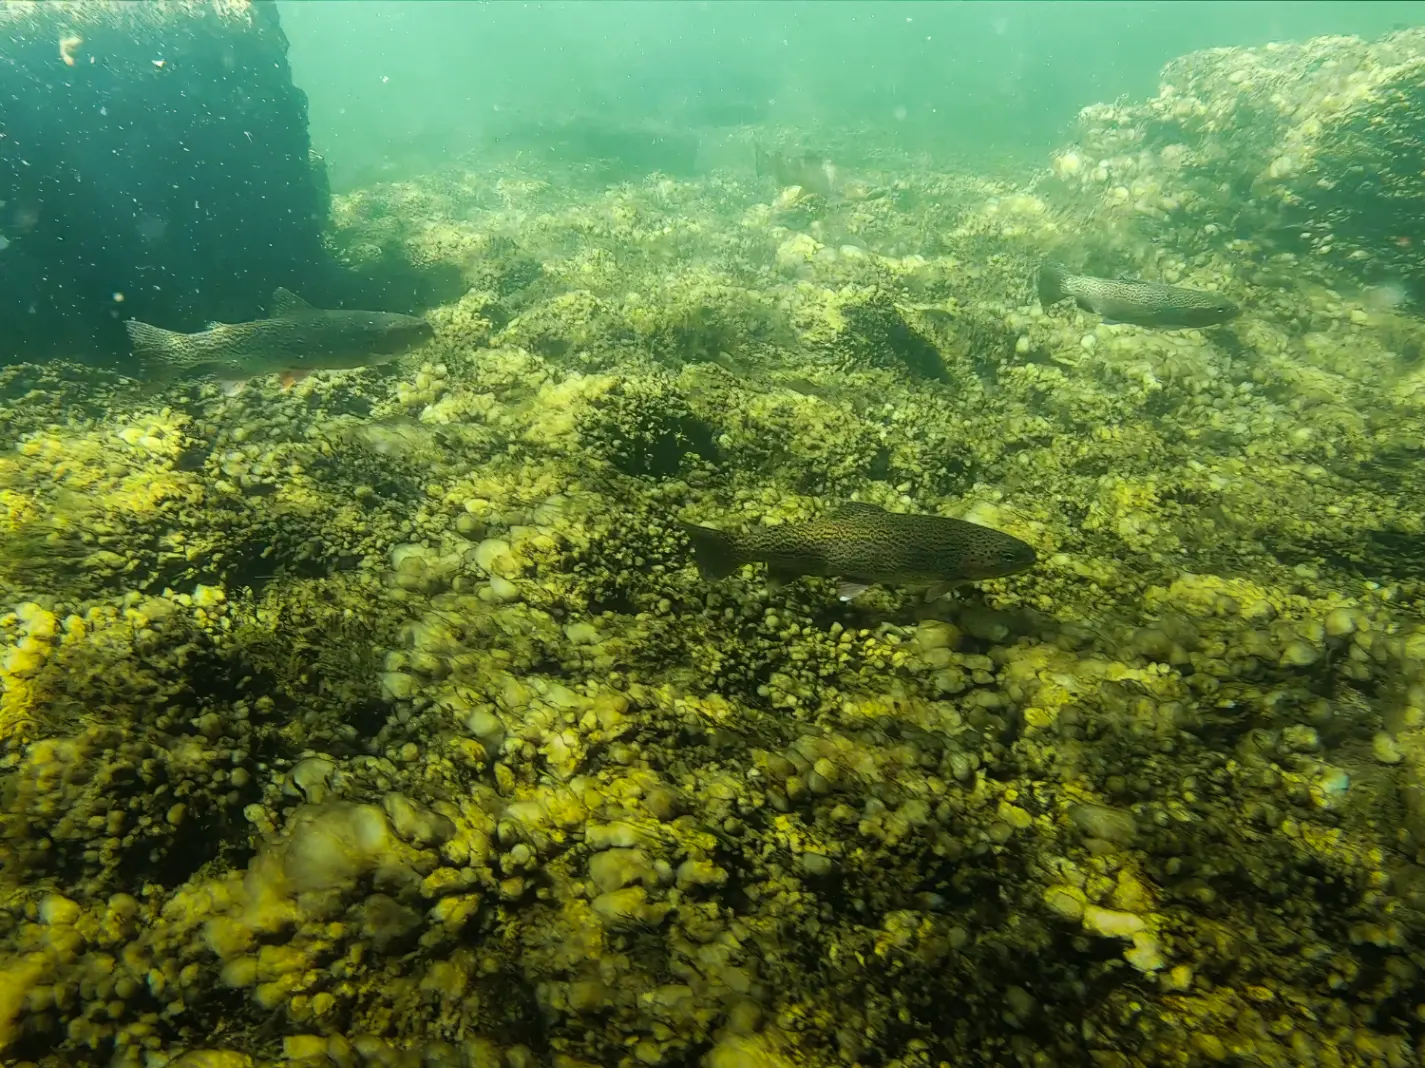
There are two kinds of currents, vertical and horizontal currents. Horizontal currents move the water downstream at varying speeds and in varying directions on a horizontal plane. Vertical currents push water downward or upward at varying angles and speeds. Though the speeds of currents change wildly, I typically refer to them as fast, medium and slow:
- Fast Current means there is substantial whitewater in the current.
- Medium Current means there is visual flow, but no whitewater and the water has distortion to from the current. This is often the best water to fish for trout for a myriad of reasons.
- Slow Current means there is little to no visual flow, no whitewater, and if clarity is good, you can see down and into the water well. You’ll find slow current in deep flats where there is little gradient and the water deepens, slowing everything down. It can be hard to get a drift in slow water.

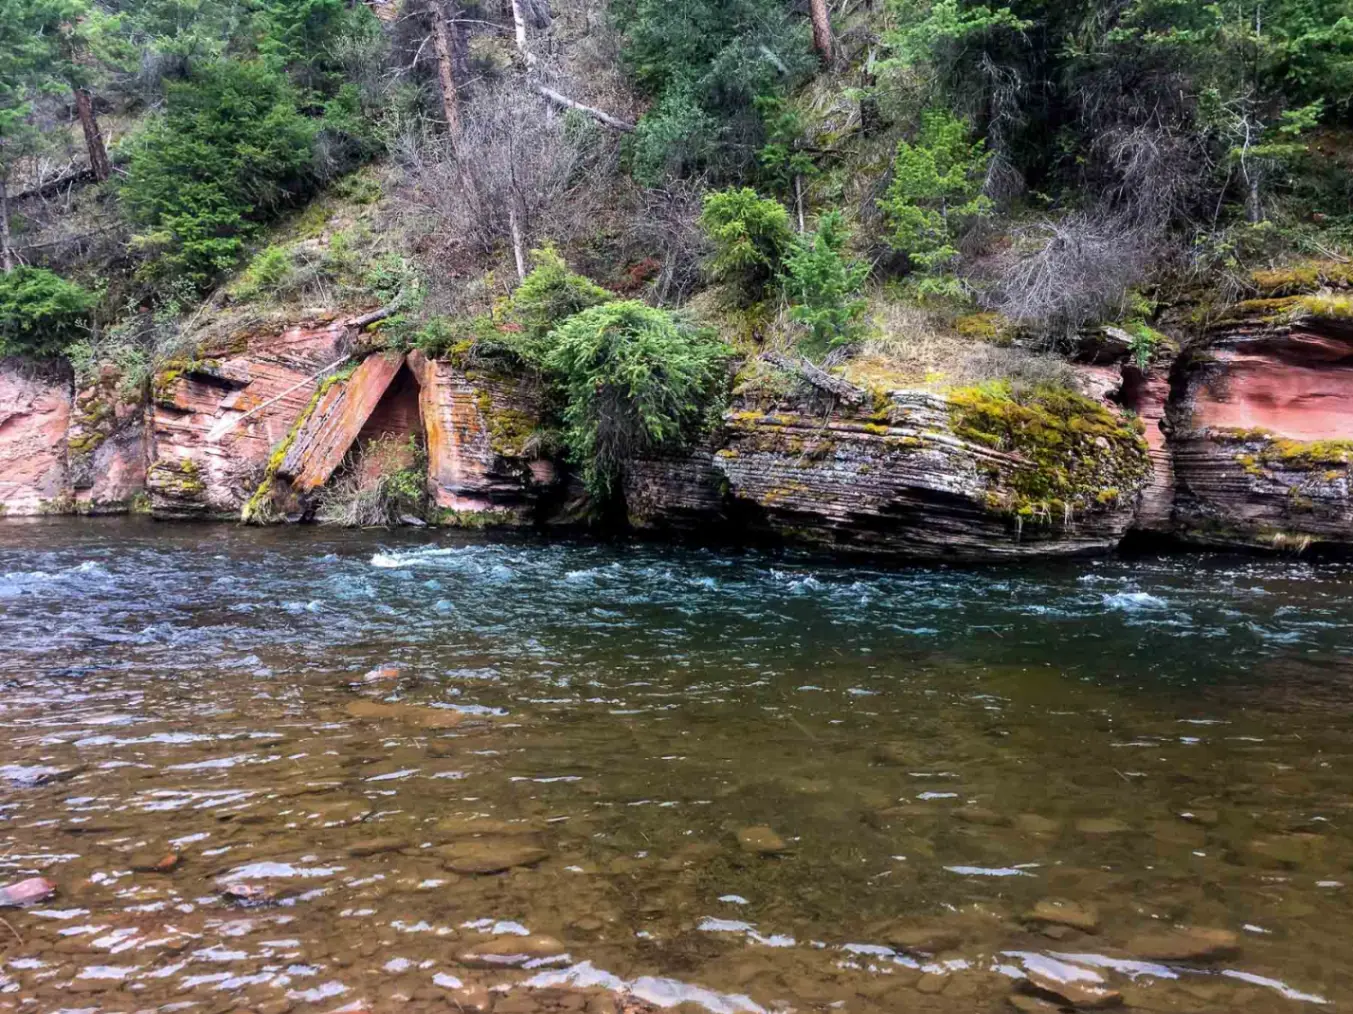

Of course, this is a simplified definition of current speeds, but it works as a baseline for this course. This will help you visualize what they mean or look like while you read and watch the videos.
Water Types
There are seven different types of water that I treat differently for nymphing. They all have different characteristics that require a change in approach. We will go over these different techniques in later lessons, but for now let’s define the the water types, so we can focus a few tips on line control before we move on.
 Riffles are sections of the river that feature fast and shallow water. They always come after a deeper section of water. The gradient of the stream usually increases slightly, and the 3 feet of water that was moving at a certain speed now speeds up and shallows to 1 foot deep, at times creating a whitewater effect.
  Pocket water features small “pockets” of slow water behind structure that breaks the current, with fast water around the structure. Think boulders, partial log jams, and other debris in the river that cause the water to go around the obstruction and create slower water directly behind it. This is some of the most attractive water to anglers, and yet can be some of the most difficult to fish successfully due to the large differences in current and depth.
 Holes are sections of river that are deepest and slowest, often with faster water going over the top of it. The water is typically calm and of uniform current for the length of the hole, and holes are often located before a run and just after a riffle. These are the most attractive and popular places to nymph.
- Plunge pools are holes that have exceptionally fast and turbulent water feeding them. Plunge pools offer attractive, but difficult-to-fish water because there are many conflicting currents. Cheeseman Canyon on the South Platte is littered with plunge pools, making it one of the most technical rivers to fish.
- Runs are stretches of water with uniform depth and current, and they commonly have foam lines through the current. These are often the most productive parts of a river or stream. A run isn’t as deep as the hole it came from, but deeper than the riffle, making it a perfect place for insects to hatch and for trout to feed.
- Slack water is any section of a river that has little to no current. It’s often difficult to get a good drift in these sections, and it’s easier for fish to take their time examining and rejecting your presentation. Many insects emerge in slack water, and during active hatches, trout fish move in to feed on the insects.
- Eddies are sections of the river that swirl or flow in the opposite direction of the main current. Fish often face into the current (which means downstream, relative to the main current), or they sit under a foam patch, where they can feed in relative safety. Eddies are almost always holding fish, but they can be tough to fish successfully because of conflicting currents.

 Pocket water


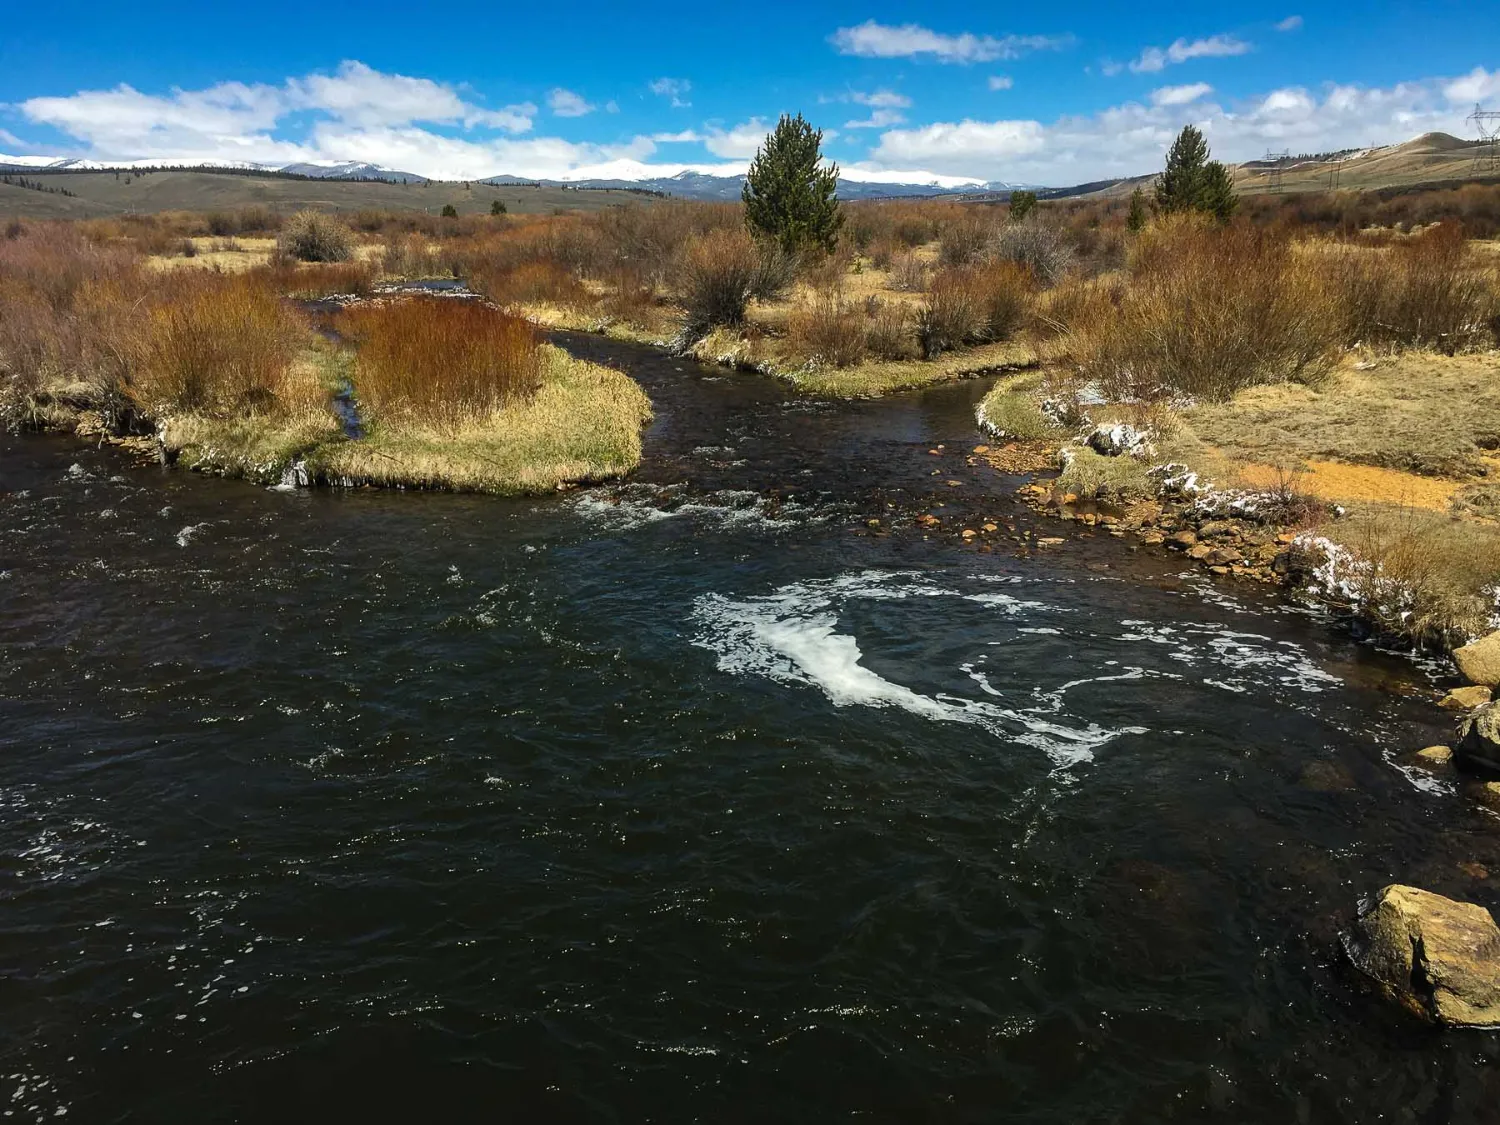
Now that you understand the two types of current and seven types of water conditions you’ll experience, let’s look at the common techniques used to prevent drag and reduce slack and get a good drift.
Trout University
The Best Way to Master Fly Fishing for Trout
Everything you need to learn how to fly fish for trout.
From fly selection to presentation and location, all in one place.
8 Premium Courses
15 Video Classes
1-2hr Power Classes on Key Subjects and solidify your learnings
6 Streamside Courses
10+ Hours of Fishing to See Our Methods in Action
Highsticking
a Tired arm is worth the Trout
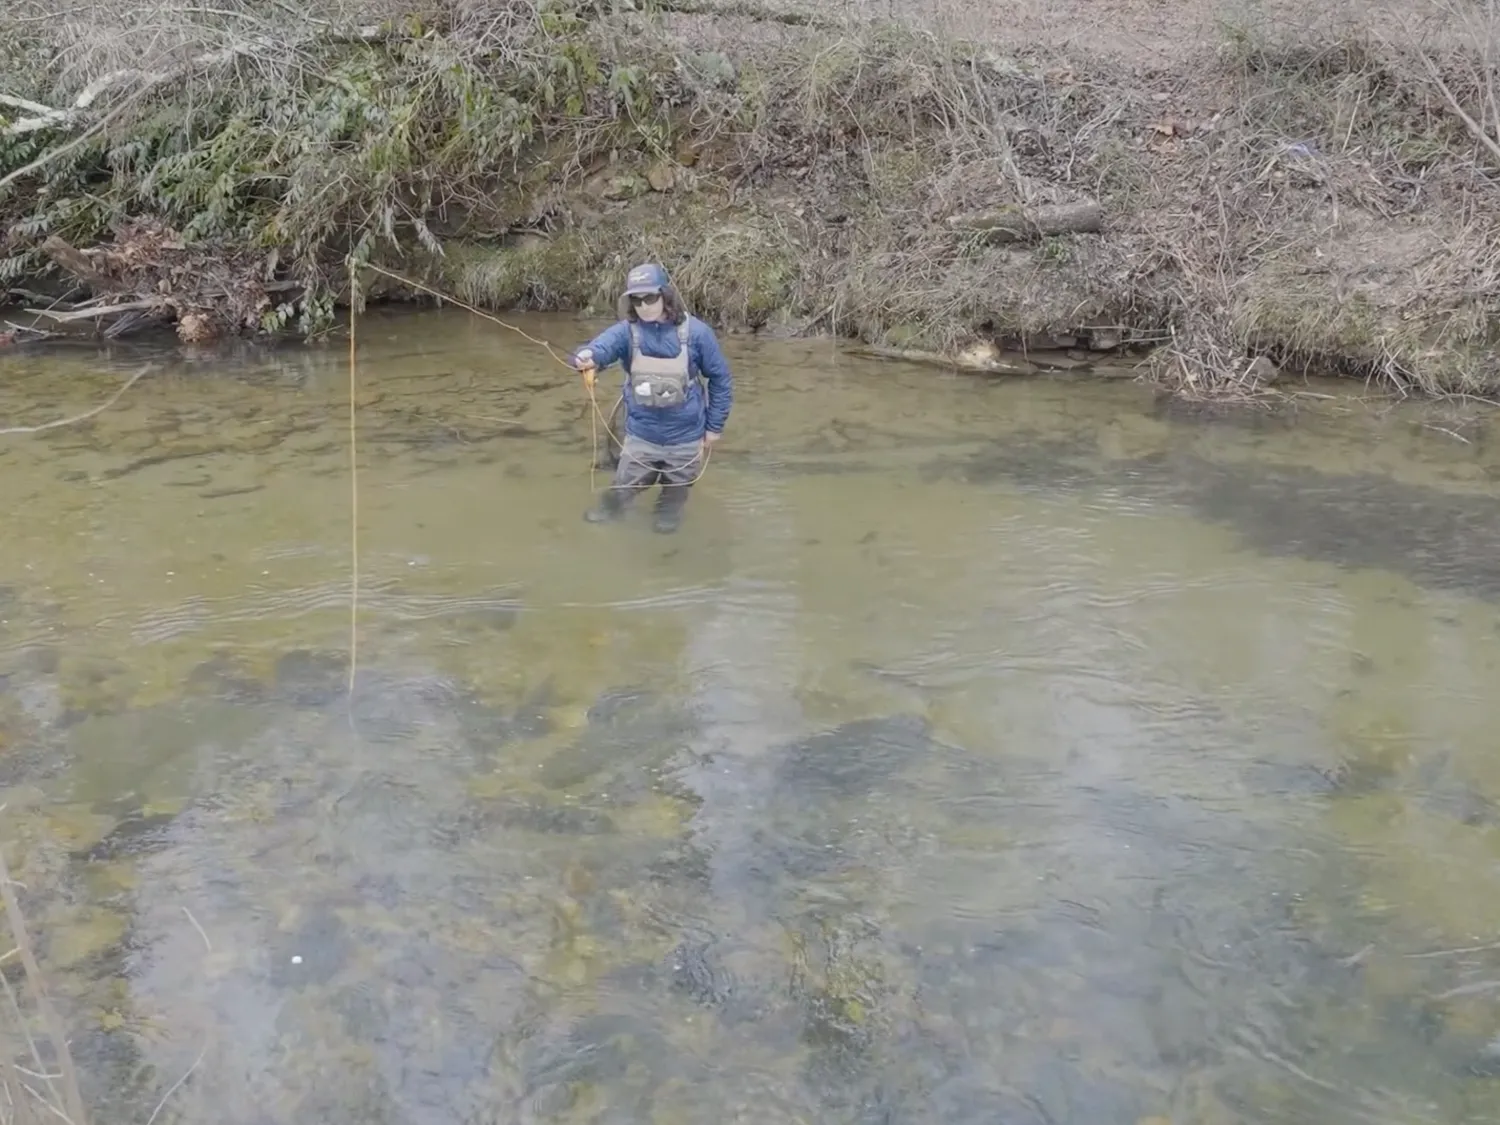
Learning how to high-stick will likely be the most valuable skill you learn while fishing. If you are using tightline-nymphing techniques, nearly all of the rigs demand that you use some high-sticking method. If you use classic-nymphing techniques, you don’t have to use high sticking techniques, but they are often your best option, whether you have 50 feet of line out or 10 feet of line out.
Purpose of High-Sticking
The more line you have on the water, the better chance you have of creating a bad drift. The current pushes against the line in different ways, making a natural drift more difficult. With all that line out, it is also harder to set the hook when a fish eats your fly. This is another reason why you want to be as close to the fish as possible: keeping as much line out of the water as possible helps you achieve the best drift possible.
High-sticking keeps your line off the water and allows you to quickly set the hook when a fish eats your fly.
Steps to High-Sticking
- Once your drift begins, you simply raise your rod as high as you can while keeping the rod parallel to the water. It’s okay if the rod is angled upward slightly, but you have to leave room to set the hook.
- As your line, strike indicator, or sighter moves downstream, your rod tip and body should follow it at the same speed, so you are always directly facing your strike indicator. This gives you better hook setting power when a fish eats the fly.
- When the drift is complete, you can lower your rod back to a comfortable level and prepare for your next cast.
Keep Your Arm and Rod Level
It is easy to get lazy and hold your rod at an upward angle and your hands down by your waist, but this causes a problem when a fish eats your fly. Your rod tip is already high, so the only way for you to set the hook is to move your arm backward, which only gives you 2 to 3 feet of hook-setting power. If you have your rod parallel to the water, with the tip level with your arm, you have more like 5 to 10 feet of hook-setting power. Keeping your arm level with the rod sets you up for getting more fish to the net.
Follow the Line
Don’t lead the fly or let the fly lead you. It is important to keep your rod tip pointed at the spot where your line goes underwater. With classic nymphing, this usually means pointing your rod tip at the strike indicator. Following the line prepares you for the hook set and presents your flies naturally. If you are leading your flies, you’re likely dragging them, if your flies are leading you, you’re likely slowing them down more than what is natural. This adversely affects your dead drift.
Keep the Minimum Amount of Line on the Water
The whole point of high-sticking is to keep as much line off the water as possible, so make it the goal of your technique.
Be Sure to Include intro section about how you have to manage your slack line during a longer cast/drift and how high-sticking and shorter casts will help you catch more fish than making long casts.
Mending
Where you Get Back Points
Mending—moving the line on the water in some way to minimize slack or drag—is what you do to manage the drift when you can’t high-stick. There are several ways to mend, but most commonly, you mend upstream or downstream. In order to mend successfully, you have to be able to read the current on the water. This isn’t difficult, but many people get intimidated by the prospect of reading water.
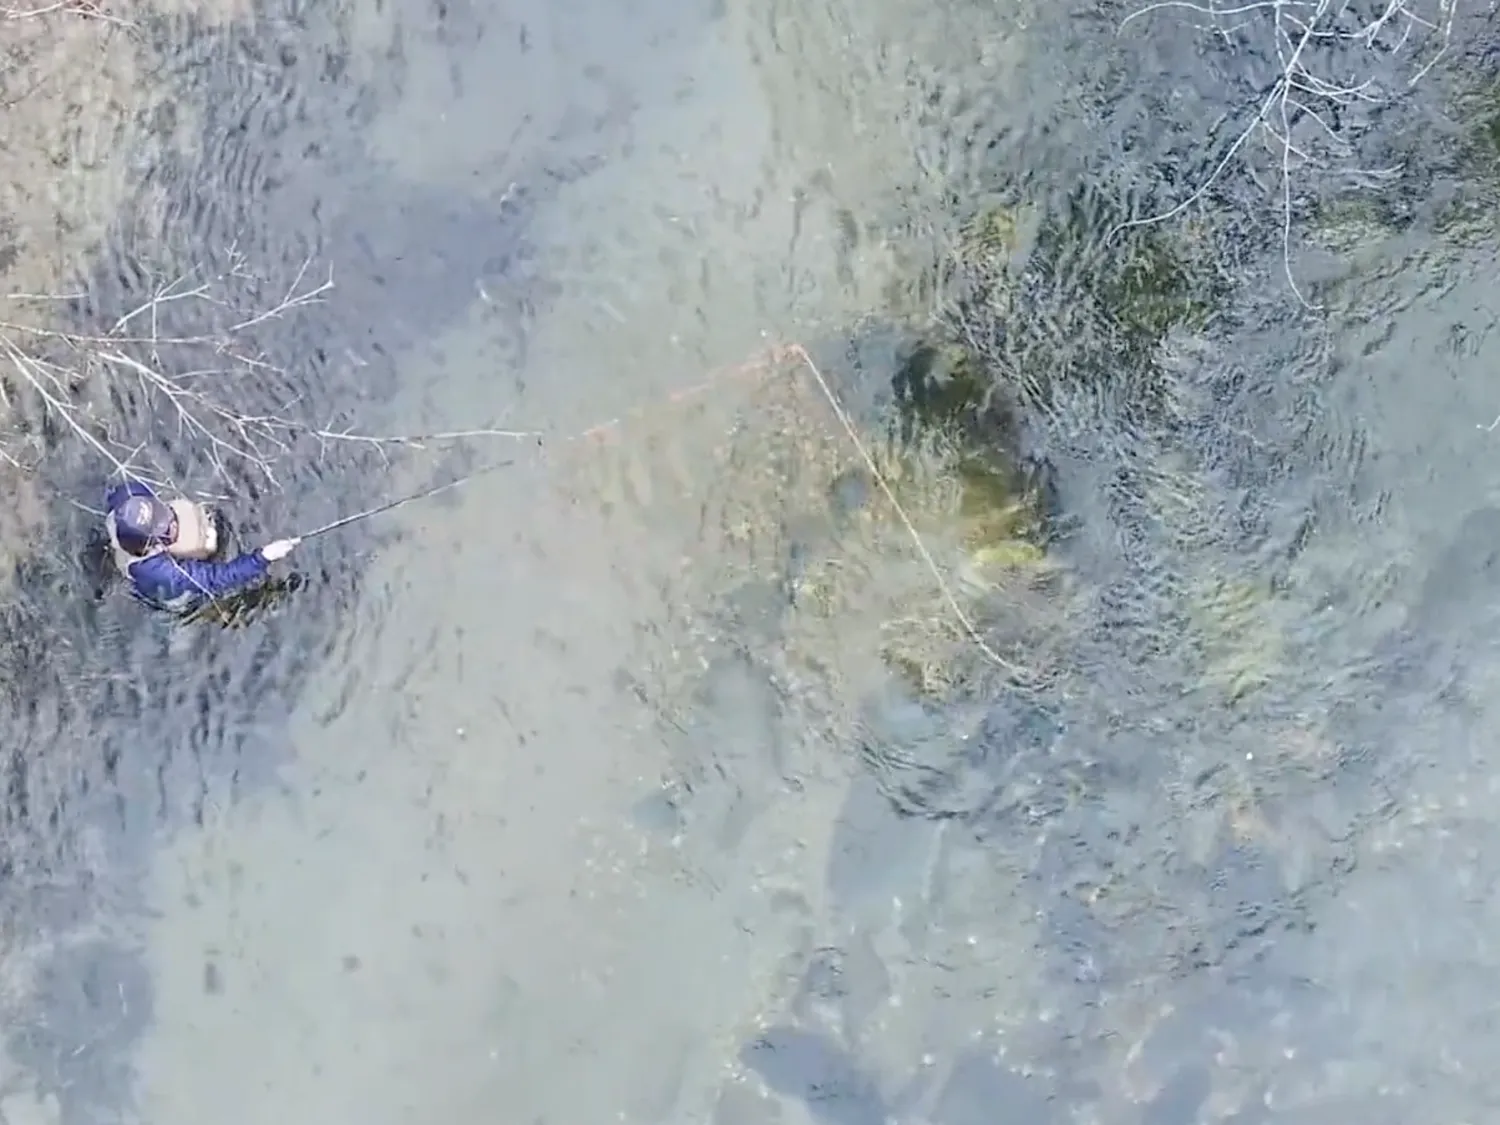
The fastest and easiest way to learn how to read currents is to practice on the water. Here is an easy set of steps to figure out how you need to mend.
- Make a cast into the water where you’d like to make your drift
- Let out some slack line and just let the current do what it wants with your line.
- Pay attention to the way the line moves between your indicator and your rod tip. Faster currents will push your line downstream of your indicator, and slower currents will keep your line upstream. Use this knowledge on your NEXT cast to mend upstream or downstream accordingly, counteracting the effects of the current.
If your indicator is dragging due to the current, a mend is required to achieve a good dead drift. Often there are multiple currents exerting force on your line, but focus on the strongest current when you mend. Remember, if you can high-stick, you may not need to mend at all.
See our video below for instructions on mending upstream and downstream mends, as well as some tips to help with the process.
- Mend early: the later in your drift you mend, the better the chance that you will move your flies unnaturally.
- Mend with your arms, not your wrist. It’s much easier and more accurate to mend using a long stroke with your arm than a quick flick with your wrist. Using your arm will create a more consistent and accurate mend, resulting in a better drift.
At this point, you should have a good understanding of how you can reduce slack and drag to get a good drift. Now let’s talk about getting ready for the take, when a fish eats your fly. If you can stay prepared for the take, you will be able to hook and land more fish than ever before. Let’s look over some essential techniques needed to prepare yourself for the take.
Preparing for the Take
You’re almost there!
We’ve made it to the last step before you catch a fish. All your hard work has come down to this. Sometimes, you’ll get lucky, and a fish will hammer the nymph so hard that it is hooked and jumping out of the water before you have time to do anything. Most of the time, however, it seems that trout know the exact moment you aren’t paying attention, and they eat your fly and spit it before you have a chance to react. This is why paying attention and being aware of your body, rod, and your surroundings is important.
Anglers who have fished for a while but still struggle to catch fish on nymphs often fail to use the tips outlined below. They have the right flies and rig, know how to cast and get a good drift, but they miss so many fish either because they aren’t ready or aren’t paying attention. Let’s learn how to be properly prepared for the fish to eat our fly so we can hook and catch more fish when nymphing.

Body Movements
Let’s start with your body position and movements. When you’re drifting your fly through a run or a hole, keep the front of your body pointed toward the indicator or wherever your flies are drifting. If you let your flies get below you and you’re pointed upstream, it’s more difficult to set the hook quickly and in the correct direction in order to hook fish. If you keep your center pointed directly at your drift as it moves through the water, you’ll be ready to set the hook properly. Have your feet in a comfortable yet athletic position, so you can pivot your body as close to 180 degrees as possible. Wherever the midpoint of your drift is, that should be where you are square with your feet and facing forward. As the drift begins, turn to face upstream, with your feet in place, and then rotate your body through the drift, ending with your upper body turned downstream. This allows you the maximum amount of room to set the hook and the optimal angle on the fly so you drive the point into the trout’s mouth, rather than pulling the fly away.
Rod Tip (behind, at, or in front of drift)
The next essential step to be prepared for the take is to have your rod tip pointed directly at or slightly downstream of the drift. Where your rod tip points is where your hook set will start. If your rod tip is pointed elsewhere when a fish eats, the hook set will be delayed because you have to catch up to the drift first. The key here is to know in which direction you need to set the hook. Optimally, you want to set the hook to your downstream side, as shown in the video below. Sometimes, however, an obstruction will force you to set upward or upstream. Whichever direction you need to set the hook, the rod tip should start in the correct position.
Follow these tips on rod tip position to prepare for the strike:
- If there are no obstructions, a downstream hook set, angled upward, is the best way to set the hook.
- If there are obstructions above you, make a downstream hookset, angled downward.
- If there are obstructions downstream of you, make an upstream hookset, angled upward (as close to as straight up as possible).
- If there are multiple obstructions above and around you, set the hook along the same plane that you cast to get the drift. Often this is a downstream, downward hookset that is controlled, ensuring you don’t pull your flies out of the water and into the obstructions.
The general principle is to set the hook in a way that the point is driven into the trout’s mouth. In most cases the only way to pull the hook out of the trout’s mouth is to set the hook back across the plane along which you just drifted.
See the diagrams below to understand why certain hook-set directions work and others aren’t as optimal.


Awareness of Surroundings
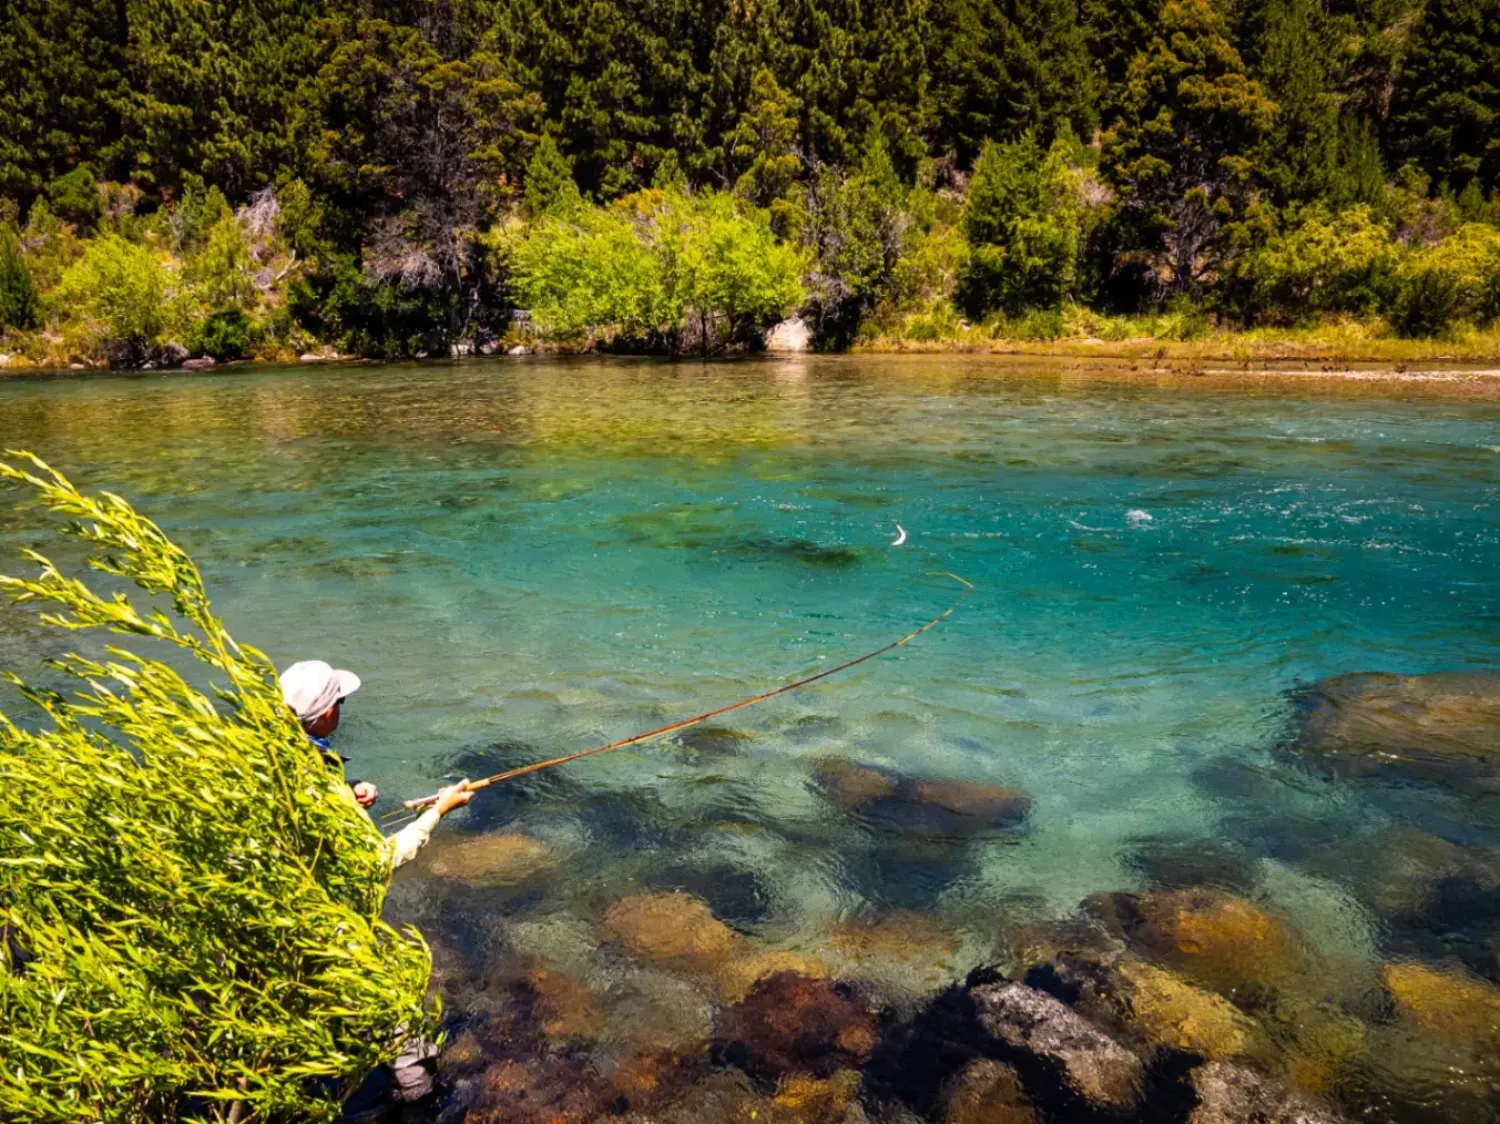
The last tip to remember is to always be aware of your surroundings. No matter how good you get, you won’t hook every fish that eats your fly, and sometimes, when you set the hook and miss, you accidentally launch your flies into the sky behind you. When this happens, just stay calm and let your flies land behind you, if there is room. Then make your adjustments and cast back out with a roll cast or water load.
What happens when there are trees or bushes behind or above you, and your flies go into the trees? It happens to the best of us, and you’ll end up wasting valuable fishing time trying to get unstuck or retying your rig. That’s why it pays to be aware of your surroundings and plan your hook set before you even get a strike. Learn to look 360 degrees around you before you cast. This helps you see any potential disasters before they happen. If there are trees behind you, a downward and downstream hook set will keep your flies in the water, allowing you to make a smooth cast out again and continue fishing.
Whatever the conditions, be aware of your surroundings so you can spend more time fishing and less time getting un-snagged and re-tying.
Extending the Drift
Bonus point Time
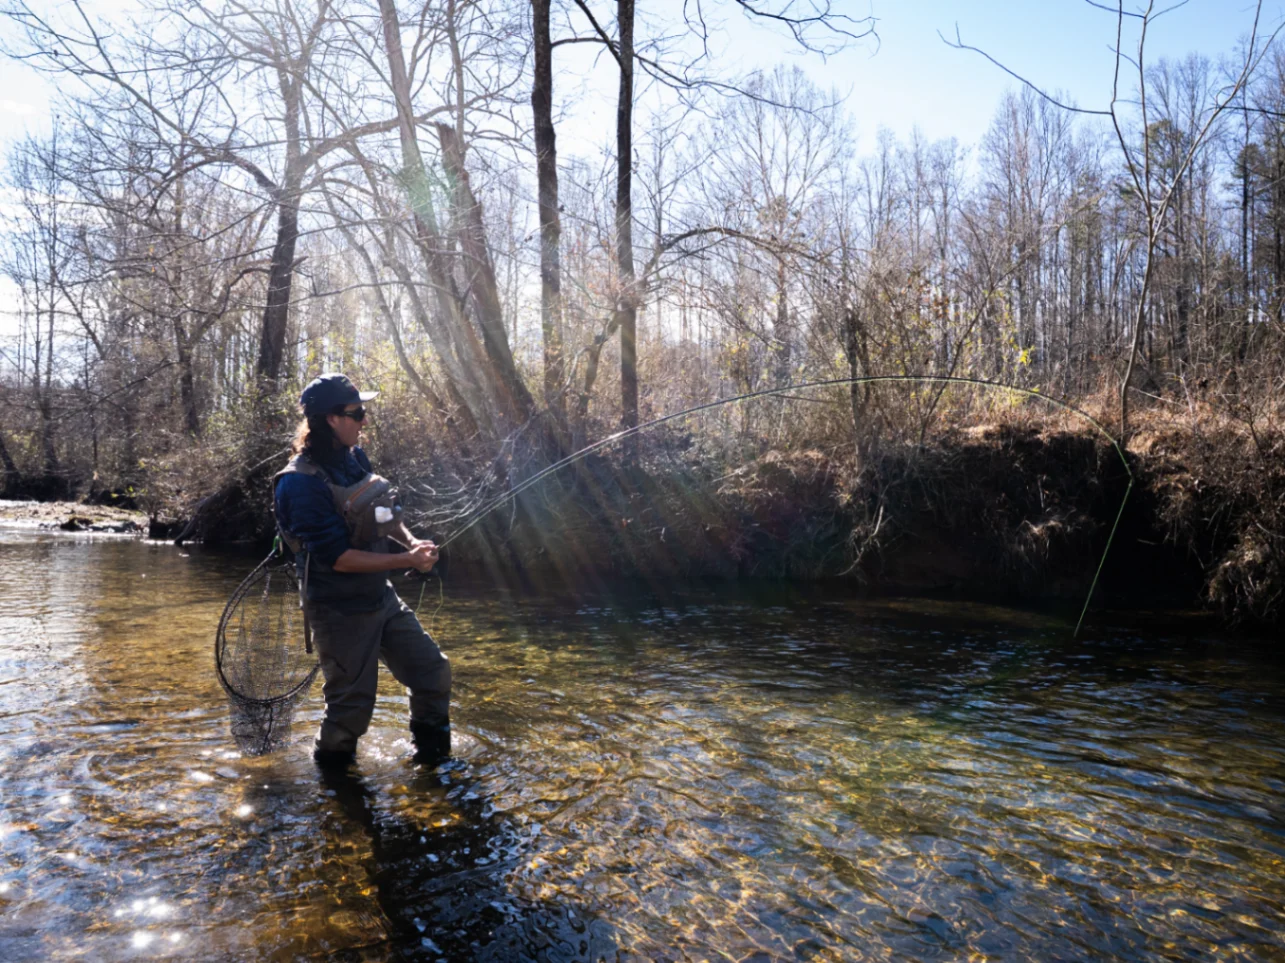
Before we move on to setting the hook, this is a good time to discuss the concept of extending your drift. Once you’ve mastered the basic nymphing process and are getting good drifts, you can start to do things that will help extend the drift. The longer you can drift successfully, the more fish you’ll catch. You have to let the flies hunt, and the only time they can hunt is when they are drifting in the water naturally.
Before we share these tips, I want to emphasize that it is difficult to get a long, natural drift. You can always get a long drift, but your flies will only drift naturally for so long because of river currents. For this reason, you’re going to find that 90% of your fish will be caught during the first 15 seconds of your drift. However, there are times where extending your drift lets you cover different parts of the run or water you’re fishing or can help you set up for your next cast if you’re making a water-load cast.
Let’s go over a few advanced tips to help you extend your drift.
Feed Line at the End of a Drift
The best way to maximize your drift is to let more line out at the end of your drift. When your line comes tight to your indicator, the flies begin to swing toward you. In some situations, this is a good thing—imitating emerging nymphs rising in the water column—but most times, this means it is time to cast again. But what if you need another 10 feet of line to drift over a spot farther downstream? You can add distance to your drift by feeding line through the rod tip onto the water. (See the video below.) It takes a little practice to get the right feel, but once you figure it out, this technique can be used to extend your drift for dry flies and nymphs alike.
Extend a Drift with Positioning and Casting
In the example above, where you need another 10 feet of dead drift, reel in, get out of the waster, and change your position. By moving around and downstream of the spot, being careful not to spook the fish, you can now get a proper drift and hook set on a fish if it eats. This is what experienced angler mean when they say, “Fish with your feet.” Take for example, the following situations, diagrams and videos. See how changing your position really helps you get a longer drift? That’s the power of position when you’re nymphing.
Knowing When to Cast Again
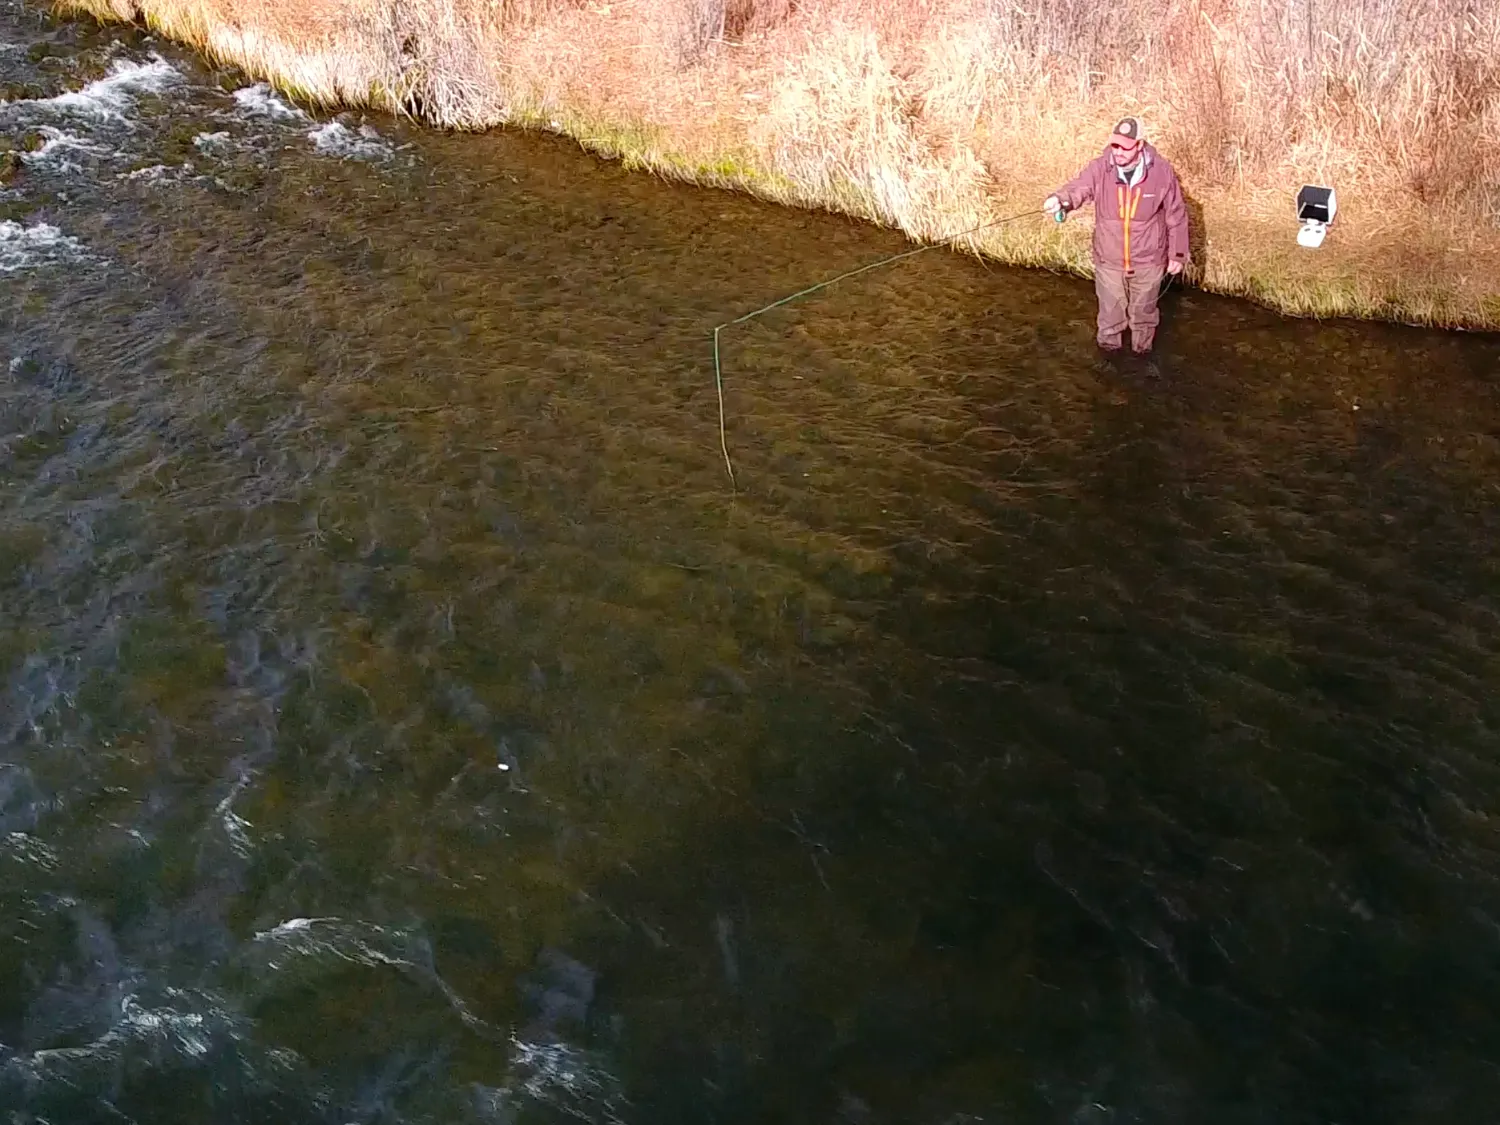
Knowing when a drift is over is a very important part to the nymphing game or any style of fly-fishing, for that matter. You have to know when to call it quits and cast again. Once your flies are downstream of you, a drift offers diminishing returns, and a drift longer than 15 seconds rarely produces fish. Focus your efforts on getting the most out of the first half of your drift, noting when you are getting strikes, and you’ll quickly find the right time to just re-cast and give it another go.
This advice doesn’t apply if you’re drifting in a boat. The reason you only get 15 seconds of good drift is because, one way or another, your flies start to drag. When you’re nymphing from a boat, you’re usually moving at the same speed as the flies, so drag is significantly reduced. Next time you’re wade fishing, try casting from the bank and then walking downstream, following your flies downstream as you walk. You’ll see how, as you move downstream, you can stay parallel or slightly below your flies, extending the drift substantially. You’ll find that nymphing from a boat is much easier than wade nymphing, but I’ve always preferred wading.
Trout University
The Best Way to Master Fly Fishing for Trout
Everything you need to learn how to fly fish for trout.
From fly selection to presentation and location, all in one place.
8 Premium Courses
15 Video Classes
1-2hr Power Classes on Key Subjects and solidify your learnings
6 Streamside Courses
10+ Hours of Fishing to See Our Methods in Action
Wet Fly Techniques
An Alternative to Classic Nymphing
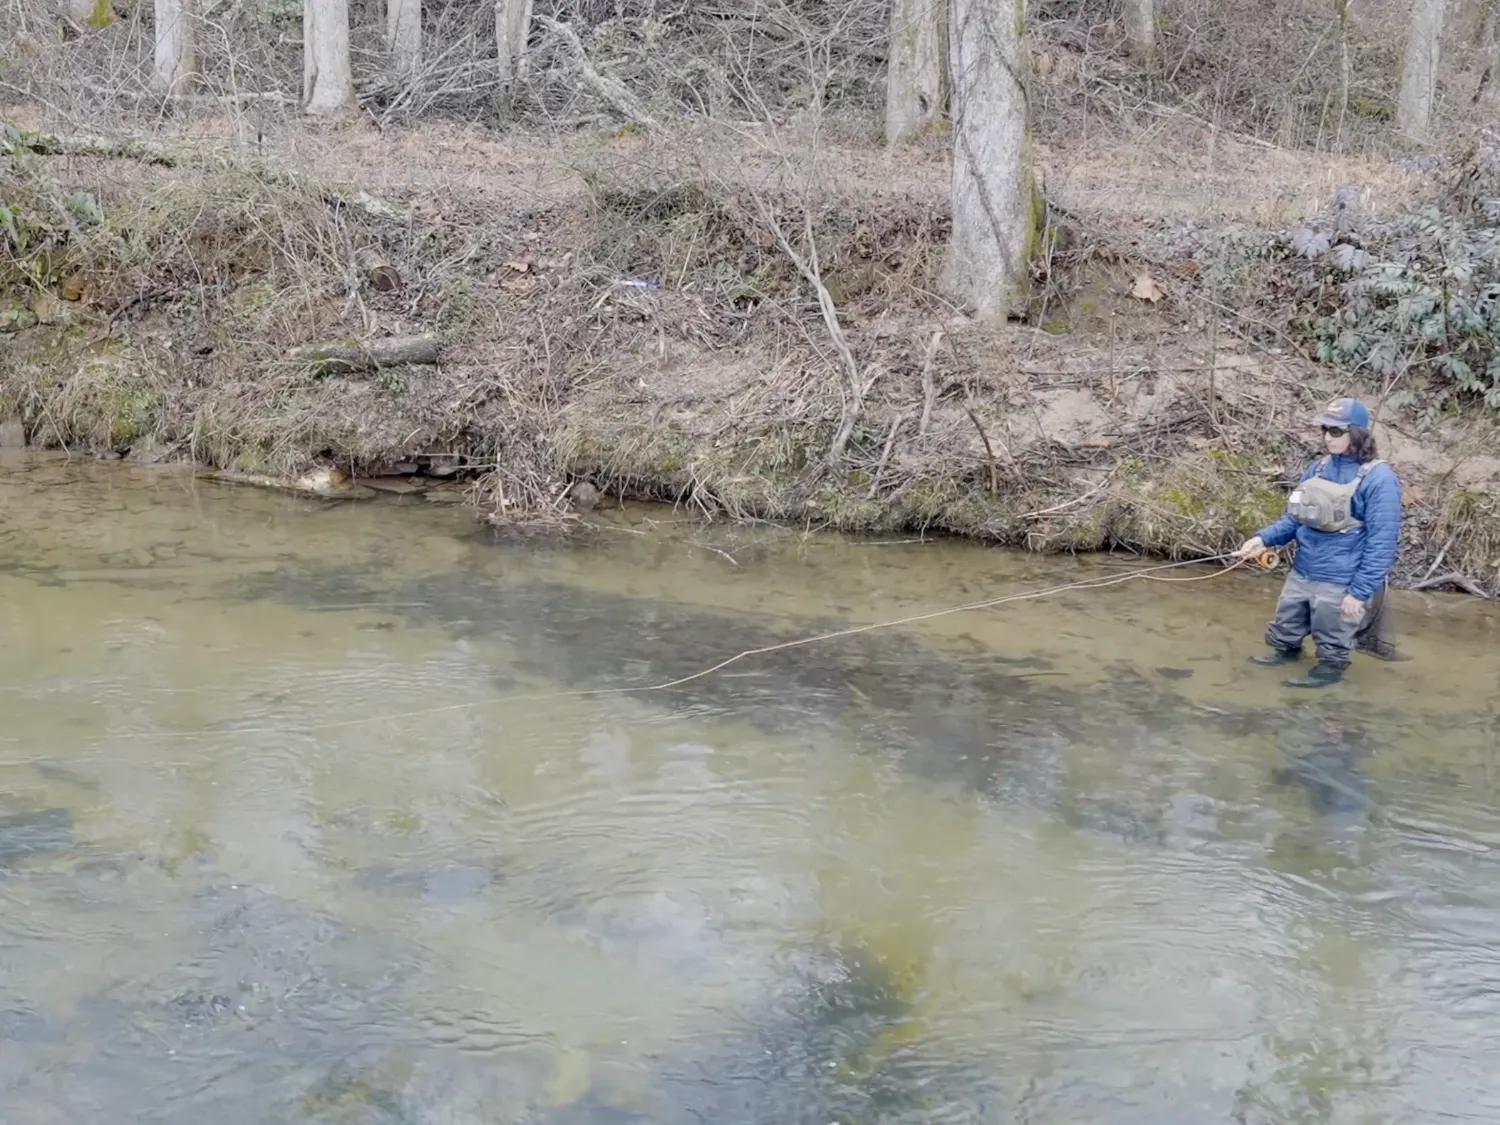
Wet fly techniques are designed to work with wet flies, which are often soft-hackle variations of well-known patterns and may be unweighted and beadless. However, you can apply this wet-fly technique to any nymph set up. The purpose of wet-fly techniques is to add movement to your flies—rather than trying to achieve a dead drift—swinging, jigging, or some combination of the two to imitate an emerging or swimming nymph. There are dozens of mayflies, caddisflies, and other aquatic insects that move a lot in the water. Not all food floats drift in a lifeless, helpless fashion. Wet fly techniques were developed to imitate movement on fly patterns and work very well.
In my experience, there are times when trout aren’t taking dead-drifting flies, yet wet-fly presentations will draw strikes. Before and during a hatch are excellent times to fish flies with some movement, as insects seem to be most active below the surface during these periods.
It’s best to take the indicator off because your line is tight the whole time and you’ll feel any strikes. This brings up an important tip. It’s easy to get excited when a fish eats, and your reaction may be set the hook immediately. With wet-fly techniques, however, this will often pull the fly out of the trout’s mouth, leading to missed fish. This is frustrating when you are first learning. A better idea is to slightly loosen your grip on the line and relax. This will help you to not set the hook as quickly and allow the fish to hook itself. When you feel a fish eat, calmly drop your rod tip about 1 foot, and then you can set the hook. This helps the fish get the fly in its mouth, and most fish will hook themselves. Don’t work yourself out of a fish, and you’ll have a lot of fun with this technique.
Swinging Flies
The basic swinging technique works well with one or two soft-hackle flies that offer lifelike movement to imitate the natural insects.
Cast slightly upstream or directly across the river, and then allow the flies to swing across the current downstream of you. The goal of the swing is to make a slow, controlled swing. To make this happen, keep as much line out of the water as possible and slowly bring your rod tip back upstream as your fly goes downstream. This will tighten the line and cause your flies to swing. Often on the swing you’ll get a strike. If not, repeat your cast with a water load cast or similar cast and repeat until you get your desired results.
Wiggle Technique
The wiggle technique is used to imitate any erratically moving insects. Small baitfish, caddisflies, and some mayflies make some pretty wild movements, wiggling across the water and causing the fish go into predator mode.
Start with the same cast as used for the swing technique, but here you’re going to gently and minimally wiggle the rod tip throughout the swing. I’m talking very small wiggles: you are trying to move the fly an inch at a time, not a foot at a time. However much you wiggle your rod is how much the fly will move as a result. A small flutter is the desired approach, as your fly floats downstream and swings.
Watch the video below on the wiggle technique for wet flies, and you’ll see how with both dry flies and wet flies, this technique will find some fish.
Jig Technique
The jig technique is just like the wiggle technique except it is focused on vertical movements in the water column. Picture an emerging insect fighting to swim to the surface and then getting tired and sinking back down, only to try again and swim toward the surface. This vertical movement up and down is very common among emerging insects and is a good way to imitate these bugs.
Watch the video below to see the technique in action.
Rise Technique
The rise technique can be used during a drift or at the end of a drift. Sometimes you’ll be nymphing a run or hole and notice fish rising in the tailout before a riffle. This is a great time to use the rise technique. The idea is to let the wet flies drift down to where the fish are, and stop your rod or lift the rod tip ever so slightly to cause the flies to rise in the water column. Trout will jump all over this presentation if they are eating emergers and you have the right fly. You can even target a specific trout by lifting your rod tip to drag the fly in front of the fish, and then lowering and raising the fly to induce a strike. You can repeat this until you either catch the fish or are convinced that it won’t take your offering.
Watch the video below to see the technique in action.
When to Use Wet Fly Techniques
These techniques seem to work all the time. That said, they work exceptionally well when trout are rising, eating emergers, or just before and during a hatch. If dead drifting doesn’t seem to draw any strikes, try adding motion. Match what is happening both in fly selection and in presentation with what you see in the environment and you will be able to catch more fish.
We have finished up the most important part of your nymphing technique, the drift. If you were magically reading this in real-time while fishing, this would be that moment when your sighter slows or your indicator goes under and you’ve realized you actually fooled a trout. It’s time to dive into the next section, which is about setting the hook and landing the fish.
Trout University
The Best Way to Master Fly Fishing for Trout
Everything you need to learn how to fly fish for trout.
From fly selection to presentation and location, all in one place.
8 Premium Courses
15 Video Classes
1-2hr Power Classes on Key Subjects and solidify your learnings
6 Streamside Courses
10+ Hours of Fishing to See Our Methods in Action
